← Back to Tutorials
Simple Recording Tutorial (Windows)
If you use Pro Tools, Studio One, or Cubase, follow the
Recording Plugin Manual to record without changing your I/O.
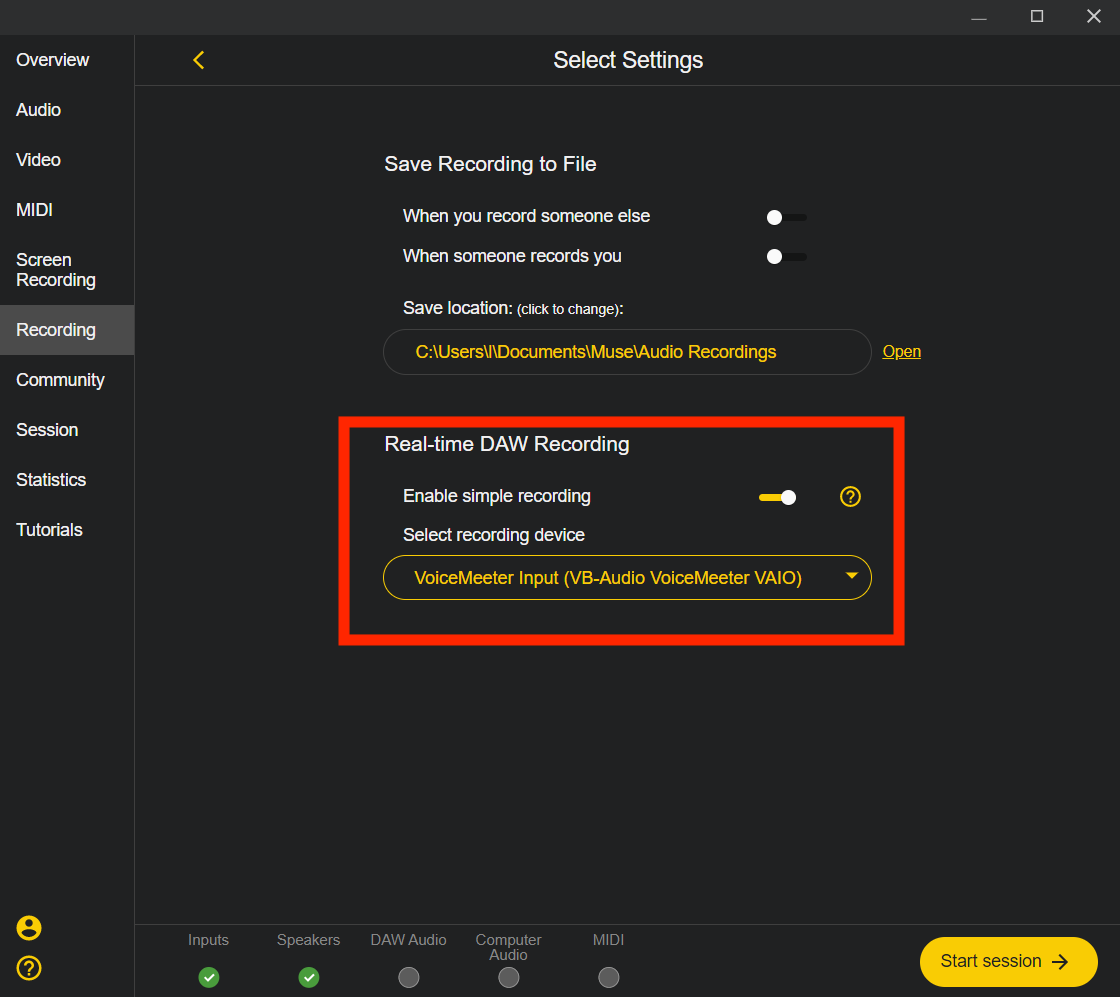
When simple recording is enabled, recorded audio from Muse will pass through the selected recording device which you can select as an input in your DAW. There is no additional setup but there will be a delay in the recording.
1. Enable Simple Recording and select the recording device

IMPORTANT NOTE: Windows users will need to use a separate device for recording and for sharing DAW audio. We recommend downloading
VoiceMeeter or
Hi-Fi Cable for recording, so that you can use
VB-Audio Cable to share DAW audio. Be sure to follow instructions on these Virtual Audio devices before use.
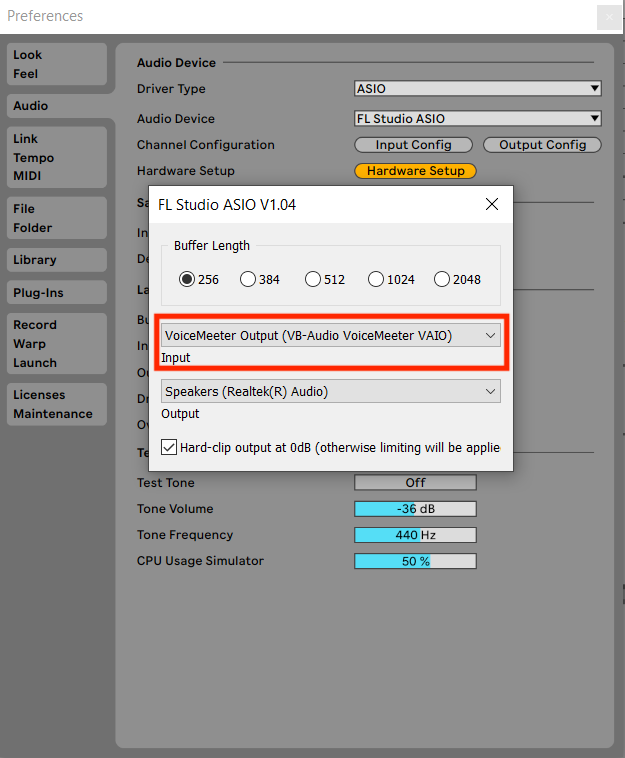
2. Select the recording device as the input in your DAW
3. Click the "record" button next to a device in Muse to begin passing audio to the recording device

4. Start recording in the DAW

IMPORTANT NOTE: Simple Recording MUST be enabled in Muse's recording settings or this won't work. By default, Muse saves recorded audio to a file. You can turn this off in settings.

Need more help?
Contact us!


